I’ve recently decided to refresh the Master Suite in my home. When my son Avery was born, I fell very ill and was unable to really organize my bedroom to accommodate Avery’s needs so a lot of things were just added to the room without much consideration for layout. This means I had a lot of changes to make and this update was long overdue. Unfortunately, I didn’t snap a “before” photo but I found a couple from 2015 that will do.

This is my starting point. Lanterns everywhere + everything I picked up on my travels. While I really loved this look 3 years ago, my life has since changed drastically. The traveling map was moved to my home office, the DVD rack should have been taken down about a decade ago, those fans are in closets and I don’t know why I was so hot or cold in the first place, my bed was upgraded to a king and I am no longer wearing cute tiny dresses because I have to chase after Avery.

During my pregnancy, we purchased a king bed, a bassinet for Avery to sleep in, and a changing table that would all fit into this tiny Master Bedroom Suite. I was unable to really think about the layout and design of the new space as getting well and taking care of Avery were my only priorities.
Now that I’m feeling much more like myself and Avery is happy and healthy too, I’m able to really consider the design of my space.

Because everything felt so cramped and cluttered, the first thing I did was declutter my space. I removed just about everything just to give me a clean slate and blank palate to work with.
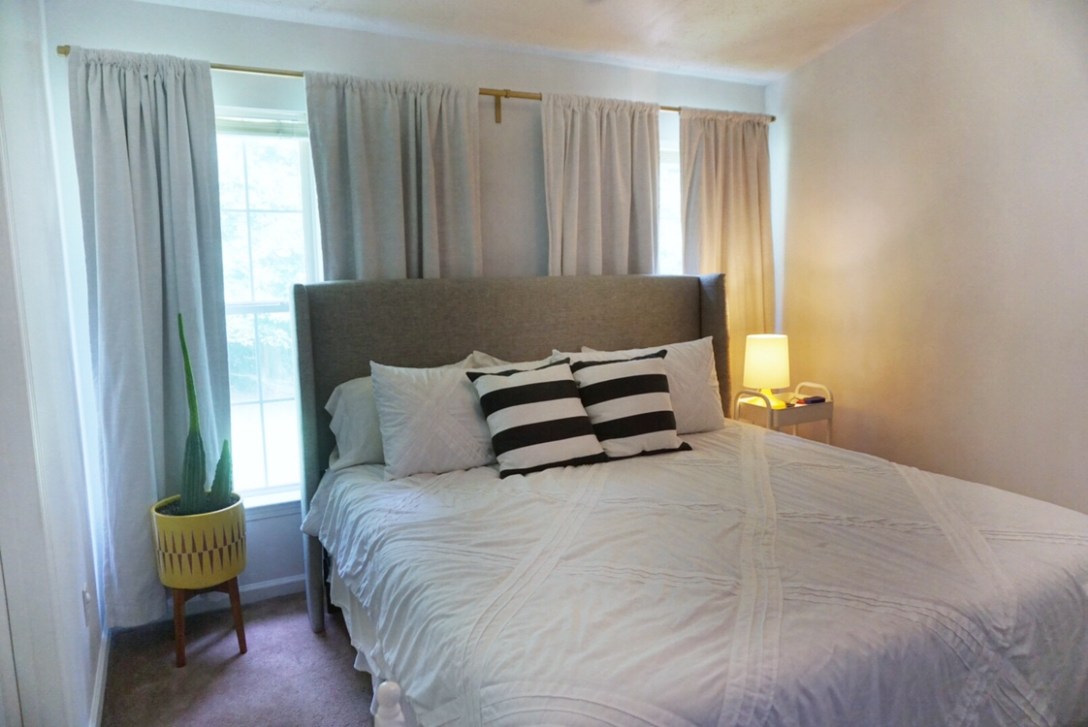
What I decided was that I wanted to continue with the light and airy vibe of the rest of house while creating a peaceful sanctuary for myself in the Master bedroom.
All walls were painted the same Ultra Pure White 2750 as in the rest of the house. This Stain-Blocking Paint and Primer In One by Behr Premium Plus is awesome for our home because it’s blocks all of Avery’s crummy handprints and with a little bit of warm water on a towel, your walls are back to new.

I moved my 15 year old chocolate chest of drawers and nightstand into my closet to open up the room much more. The complimentary dresser, Avery’s changing table, and the king bed are the only pieces of furniture that still remain in the room. There is also a small rolling cart that we purchased to accompany Avery’s changing table that is temporarily beside the bed for easy accessibility to my phone and quick little items that you need bedside.

The television will likely be mounted to the wall but for now, it sits on the dresser. The dresser is a chocolate color and adds a darkening to the room that I would like to remove so I will most likely be painting this a white or grey color in the coming weeks.

One of my favorite things about the new look of the room is how the bed is now framed against the wall. This was my inspiration for the update. It’s clear that this bedroom was designed for a queen sized bed as the space between the windows fits a queen sized bed perfectly.
Since we upgraded to the king sized bed, the adjacent wall needed an update to accommodate this.
Some of the challenges were:
- How do you place a bed on a wall with windows?
- Especially windows that cut into the space where you bed is?
- What do you do when the windows are odd widths, heights, or cut into the bed frame?
- Isn’t the bed just going to hide the view that we should be showing off?
- But what if there is literally no where else to put the bed in the room except the wall with windows?
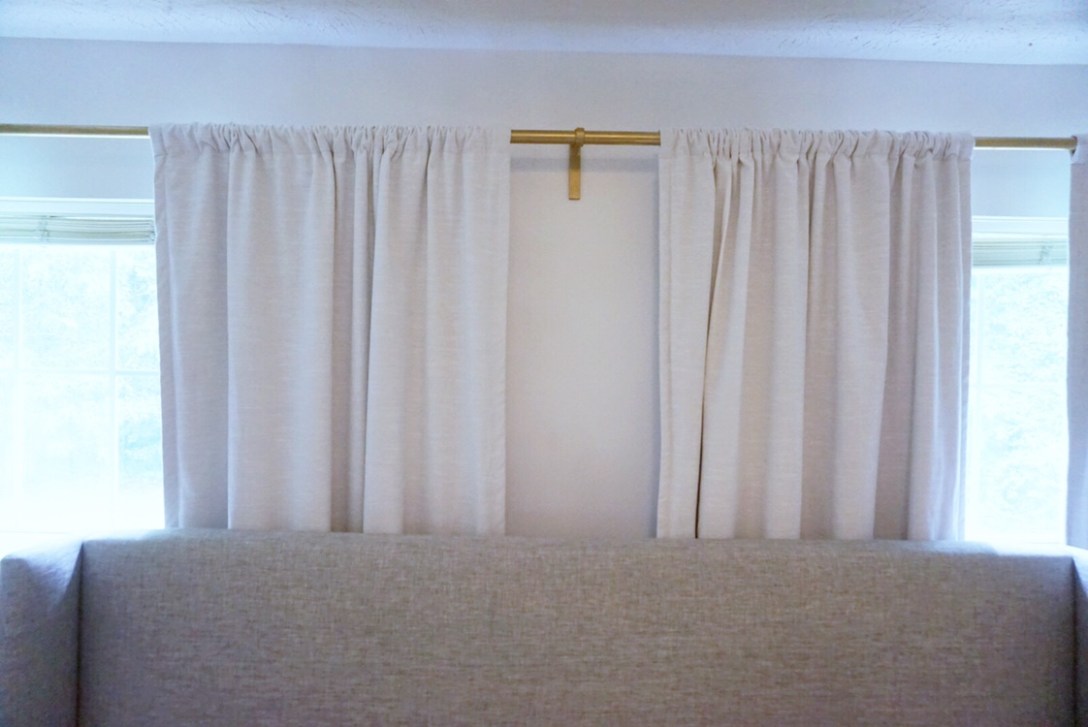
You can fix all of this with curtains. To create the effect of wall to wall windows, with light just peaking through ever so gently, you want to treat the wall and windows as one surface. Wrap the entire length of the wall with curtains. For my wall, that meant a 129″ adjustable curtain rod with 4 panels of 84″ tall black out curtains. We are trying to conceal the fact that the windows are not the entire width of the wall and giving that peak-a-boo look. That’s why thick or blackout curtains are crucial for this effect. Light, see through curtains would just tell on you.
Since we’re making changes, I wanted to embrace the current trend of gold in my space. For the first time in years, I can’t go buy everything I want from West Elm or CB2. So I hacked it.
I’m not a DIY person. Everyone may think I am because I am a creative, working in Graphic Design for years, with an eye for good design. When it comes down to it, I’m what I call a DIFM. That’s short for Do It For Me. I like to walk into a store, purchase items already painted and designed the way I want. From there I will hang, assemble, or set them up to my liking.
Since having a child, my West Elm impulsive purchases have declined dramatically but I still have West Elm dreams. To get the look, without the budget, I’ve turned to a light version on a DIY person and hacked a few items in my bedroom to give them that gold look that I was inspired by.
To learn more about how to transform your favorite pieces to gold, read my tutorial on the Gold Hardware Hacks.
—
SHOP THE LOOK
Project 62 99.9% Blackout Curtain in Natural White Henna. 50 in W x 84 in L was purchased at Target
Stain-Blocking Paint and Primer In One by Behr Premium Plus in the color Ultra Pure White 2750 came from Home Depot
Turned Wood Leg Standing Planter in Tall with color of Yellow was purchased at West Elm
All of my cactus, succulents, and trees come from Home Depot, Lowes, or Pike Nurseries
Curtain Rod by Ikea, see Gold Hardware Hacks tutorial for info.
Yellow Table Lamp was purchased at West Elm but no longer available
Wingback Upholstered Headboard by Skyline Furniture was purchased at Wayfair
I actually have a few different white bedding sets that came from West Elm and Target bu the one in the photograph came from Target but I don’t think they sell it anymore.
